Let’s start off this article with fair warning.
Painting your own cabinetry requires a lot of elbow grease and a lot of patience. An average-sized kitchen could take you up to two full weekends of prepping, sanding, and painting.
So why are so many homeowners deciding to tackle this project on their own?
- For one, it saves a lot of money.
- Secondly, it’s hard to get on a painter’s schedule if you want your project done in the next few months.
But fear not, we have compiled a detailed “how-to” that will make the most paintbrush-shy homeowner ready to roll!
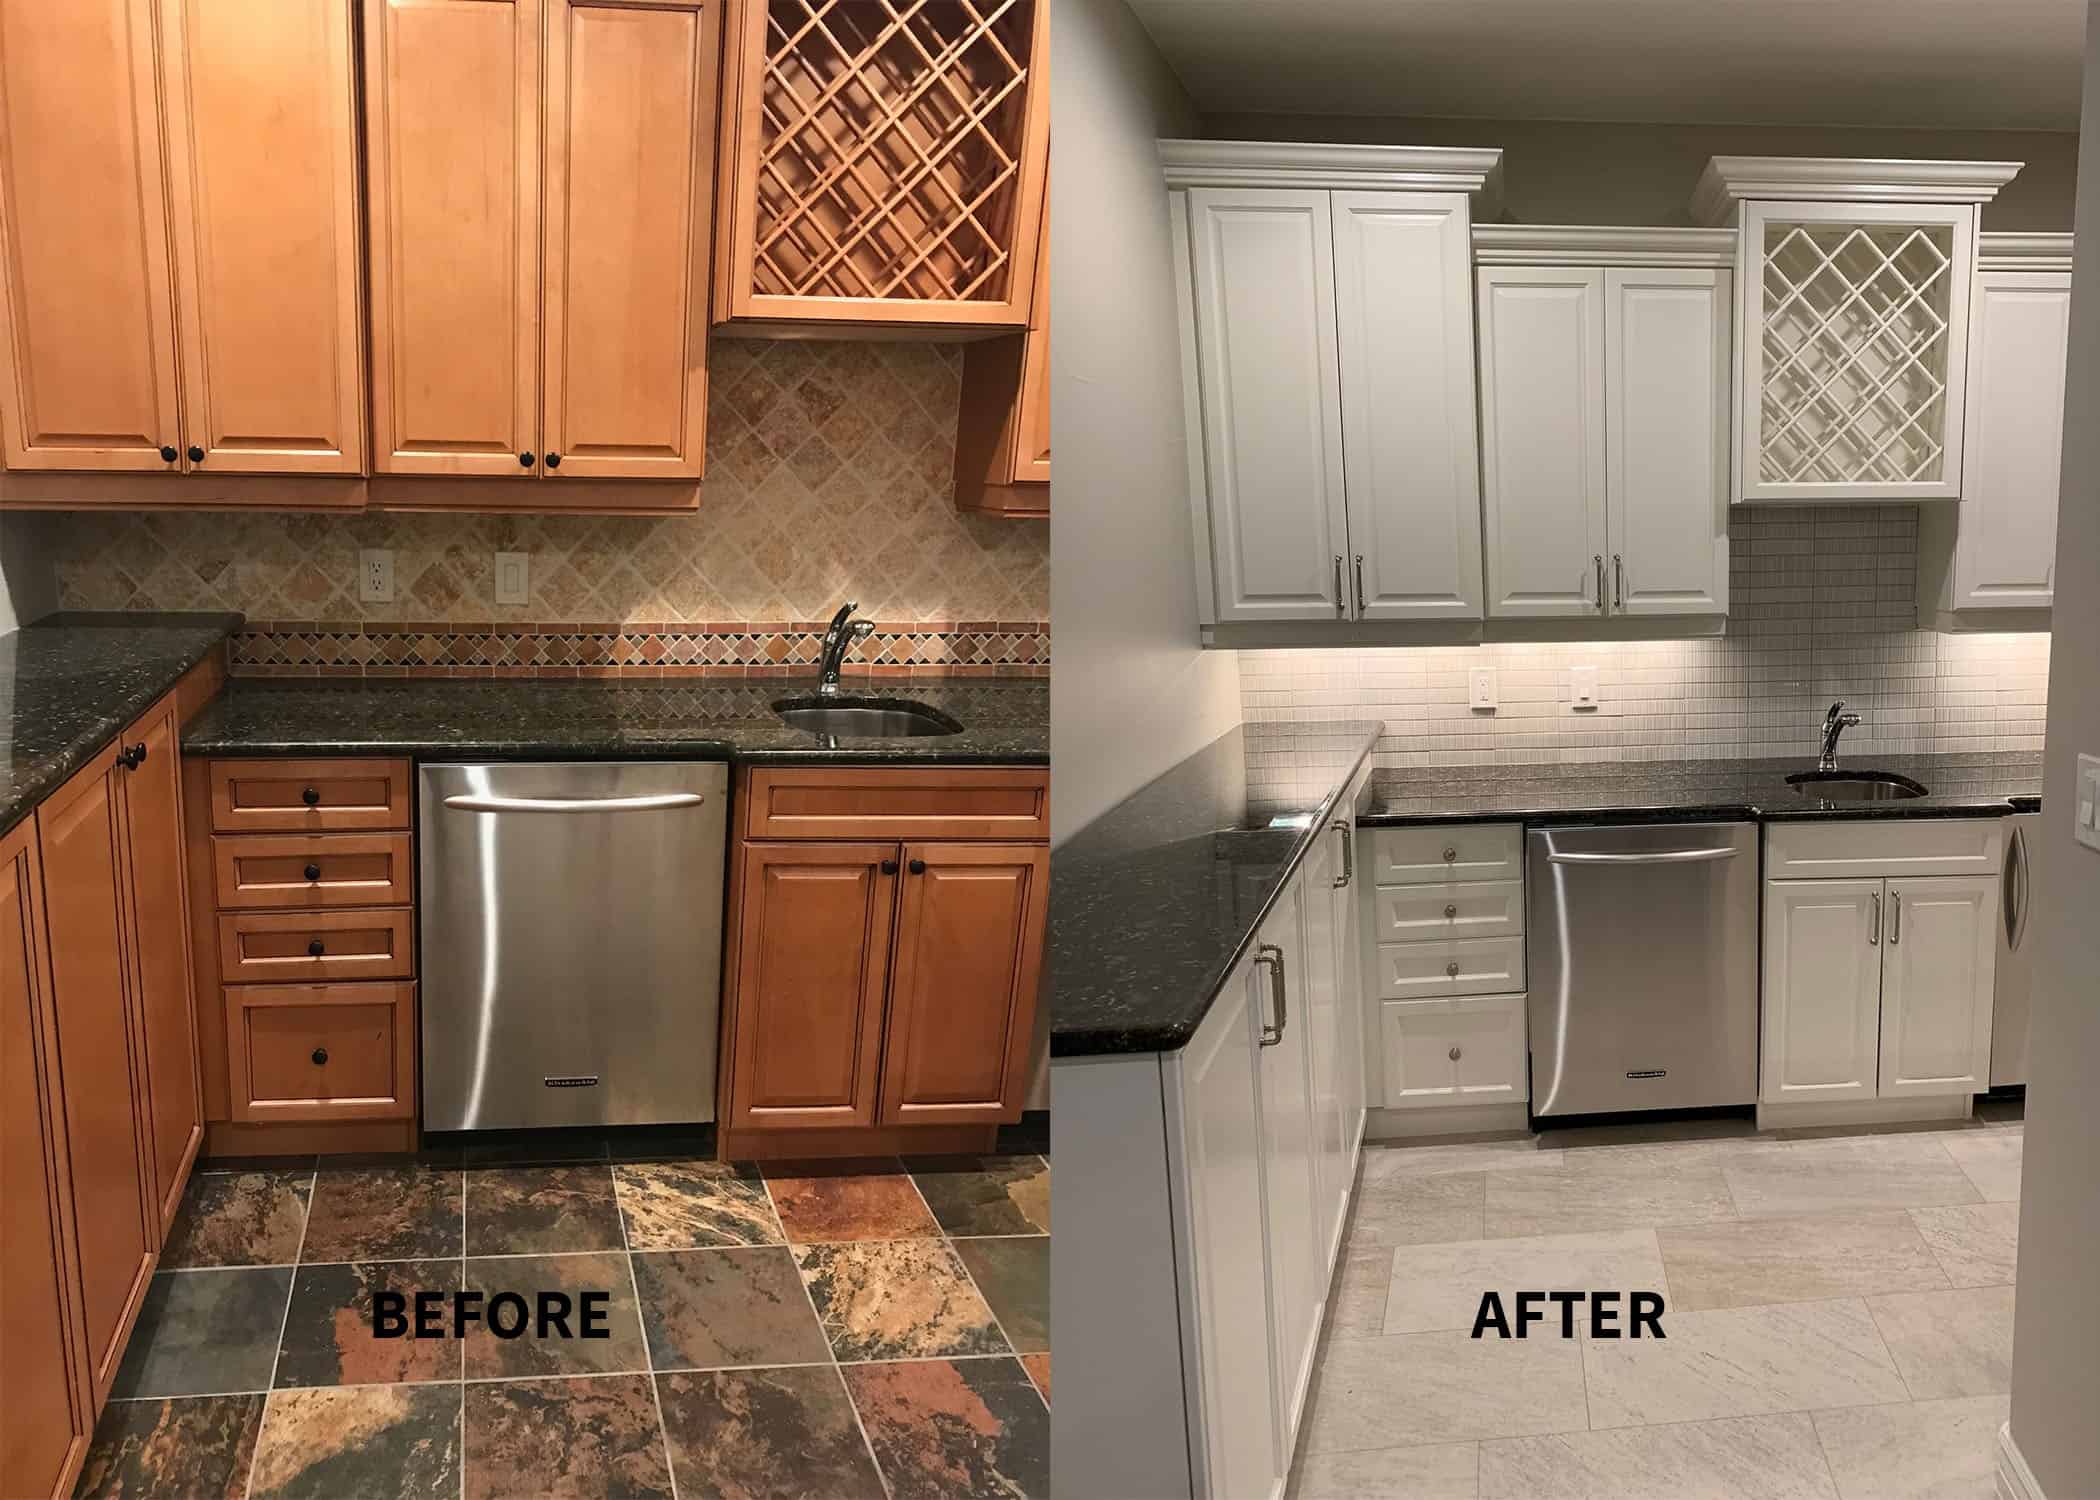
Let’s first start with a motivational pep-talk! This project could save you big in your kitchen renovation budget. Our research tells us that resurfacing and painting your old cabinets can run you upwards of $7,000 for an average sized kitchen.
We asked a customer of Precision Countertops about his recent cabinetry painting project. His high quality supplies cost him far below the bid price his painting contractor gave him.
What you need to know, is most of the work is in the prep. 90% of the problems you may encounter will likely stem from the prep step not being done correctly. So get ready to spend a lot of time prepping before you get to the fun part of painting.
How to Paint Kitchen Cabinets (In 7 Easy Steps)
Learn how to paint kitchen cabinets with these 7 easy steps and see your kitchen transform before your eyes.
Step One: The Painting Supplies
It’s important to get all of your supplies ready before you start the project. Painting kitchen cabinets is not something you want to pause mid-way because you are missing an item.
Here is a simple kitchen cabinet painting supply checklist:
- Painter’s tape
- Drop cloths and plastic masking
- TSP or other degreaser (TSP is most common, read below for other options)
- ScotchBrite sponge
- Wood filler
- Coarse (80 grit) and fine( 220grit) sandpaper
- Block sander (You can rent or borrow. This is a must have!)
- Bonding primer
- Top-coat paint
- Paintbrush or small foam roller
- Paint buckets and/or paint roller pans
Be sure to vet your supplies with a local paint store professional. For example, don’t skimp on tools like a paintbrush – you will be picking off bristles from the surface or fighting noticeable strokes.
Quality matters when it comes to cabinetry painting supplies. It’s a high touch surface that you spend a tremendous amount of time looking at. This is where you want to splurge!
Step Two: Remove Hardware, Cabinet Doors, and Drawer Fronts
Take a deep breath and put some music on. Here you can relax a bit while you take off the hinges and the handles.
You do have some important labeling to do though. Your precision in labeling your doors, drawers, and corresponding hardware will save you a big headache when putting your drawers and cabinets faces back together.
Tips to carefully label each component:
- Label the door, drawer, and hardware location
- Indicate right or left side for the door, drawer, and hardware
- Keep all hardware with the original doors
Also Read: 3 Things To Consider When Deciding on Kitchen Hardware
Step Three: Masking with Painters Tape and Plastic
It’s important you protect surfaces you don’t want paint like your floors and countertops.
Armed with blue painters tape and floor protection paper, cover every inch of your flooring around the area you will be painting. Also, using plastic sheeting (we like Cling Cover 9’X400’ at Home Depot for about $23) to protect your countertops, appliances, and any interior parts of your cabinets you don’t want paint on.
Step Four: Clean, Clean, Clean
We can’t stress this enough, as months or possibly years of grease have collected on your cabinet doors. If there is any grime on the surface, the priming paint won’t adhere properly. Unfortunately, you aren’t able to skip this step and go straight to sanding to try and clean the surfaces. The dirt and grease will simply get rubbed deeper into the surface, which will cause adhesion problems later on.
We recommend TSP (trisodium phosphate) as a cleaning agent. It really lifts away grease and gloss and it’s inexpensive. It is corrosive, so be sure and wear gloves and wipe off immediately if you get the powder or water solution on your skin.
Also, read the label instructions for prepping the TSP solution for painting. Using the scratchy side of a Scotch-Brite sponge, scrub all surfaces with some good old fashioned elbow grease. Clean all of the surfaces and then do a rinse afterwards with the soft side of the sponge and clean water.
This is also where you can patch any nicks or dings the cabinets accumulated over the years. Simply follow the instructions on your wood patching material and let it thoroughly dry before the next step.
Step Five: Sanding Your Kitchen Cabinets
This step is part of the prep process that requires some extra patience – but it will pay off!
Sometimes a painting professional or online tutorial will tell you to skip this step if you don’t have a sheen on your cabinets. Sanding is important because it creates micro-grooves that the primer and paint can sink their teeth into and it will significantly help the paint adhere to the cabinet surface.
To sand the cabinetry and casings, we highly recommend using a block sander to save your arm and hand muscles! You can find these at any big box store or your local hardware store. Be sure to ask around, a fellow DIYer will most likely have a sander on hand.
We recommend you sand all surfaces at least twice. Once with an 80 grit paper to take off any sheen from the prior paint job and to sand down any uneven surfaces. Follow with a finer paper (120-180 grit) to really smooth the surface.
There are finer grit papers you can use. For example, some woodworkers recommend a 220 grit. The problem with getting your surface too shiny and slick is you want that paint to penetrate the micro grooves to successfully bond with the wood surface. The exception would be if you are staining cabinets, the higher the better as stain will make darker any scratch marks the sandpaper has left behind.
Also, be sure to thoroughly wipe down the cabinets after sanding, removing all remaining dust from the surfaces. After you have sanded all the sheen and your surfaces are clean and smooth it is prime time!
Step Six: Priming Your Kitchen Cabinets
There are many primers out there and each paint company will have their own to showcase.
Priming is important to block the color or stain from your former cabinets and get the surface ready to “grip” your pigmented paint. We suggest you do the fish-eye test here. For example, paint a small part of a cabinet with some of your primer. If you see it bubble at all, like a fisheye, then you haven’t gotten the surface properly prepped and you need to revisit the cleaning or sanding step. If you do pass, get ready to paint with primer.
First, cut the corners and crevices in with your paint brush and then follow with long, smooth strokes. The paint brush is always suited best for areas where the roller can’t reach like the nooks and corners. On the wider and more open areas, you can use a roller. The roller can help by getting it evenly applied in a faster amount of time.
The next step is critical and can’t be skipped! Let the primer dry for a good 24 hours. This is where your patience will pay off. If the primer doesn’t properly dry, your paint job could peel all the way down to the original surface.
Once all surfaces are covered with the primer coat and they have had 24 hours to dry, be sure to check for any uneven paint strokes or drips. Gently sand those areas until smooth and give the all the cabinets a very light sanding and wipe away any remaining dust. Now, get ready for the main event!
Step Seven: Painting Your Kitchen Cabinets
Follow the same instructions above. Cut out the edges and crevices then use smooth long strokes on the larger areas. Remember, when painting the smoother and larger surfaces a foam 4 or 6 inch roller can make quicker work than painting.
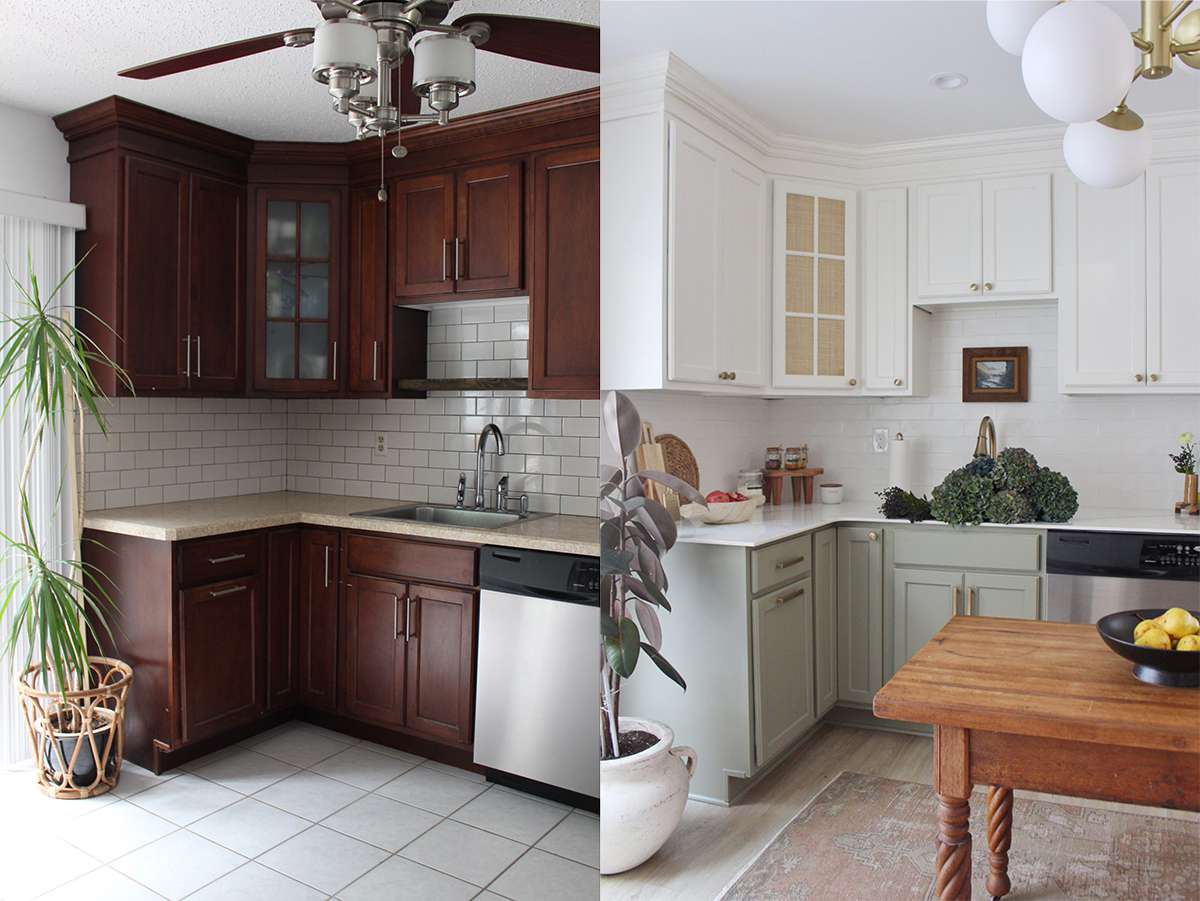
This is the exciting part that has made all of the prep work worth it! You can literally see your space transform before your very eyes.
If you decide to do more than one coat of paint, let prior coat dry for 4 hours before applying the second coat. Most of the time you can get away with one quality coat of pigmented paint.
Admire Your Work
After the paint has thoroughly dried for at least 6 hours, put the hardware back on the drawers and cabinet faces and reassemble your kitchen cabinetry. Then stand back and admire your totally transformed space!
Remember our friend who had recently taken on repainting his kitchen cabinetry? He mentioned right away how arduous the prep work was as well as the time required to complete the whole project. If there is one takeaway from this article, please prepare yourself and be patient during the process. This is a marathon, not a sprint.
The reward for tackling this project is definitely worth it. You will save a tremendous amount of money and it will totally change the look and feel of your kitchen. Have fun and be sure to send us some before and after pictures of your masterpiece!
Also Read: 10 Cozy Kitchen Ideas to Make Your Home More Inviting